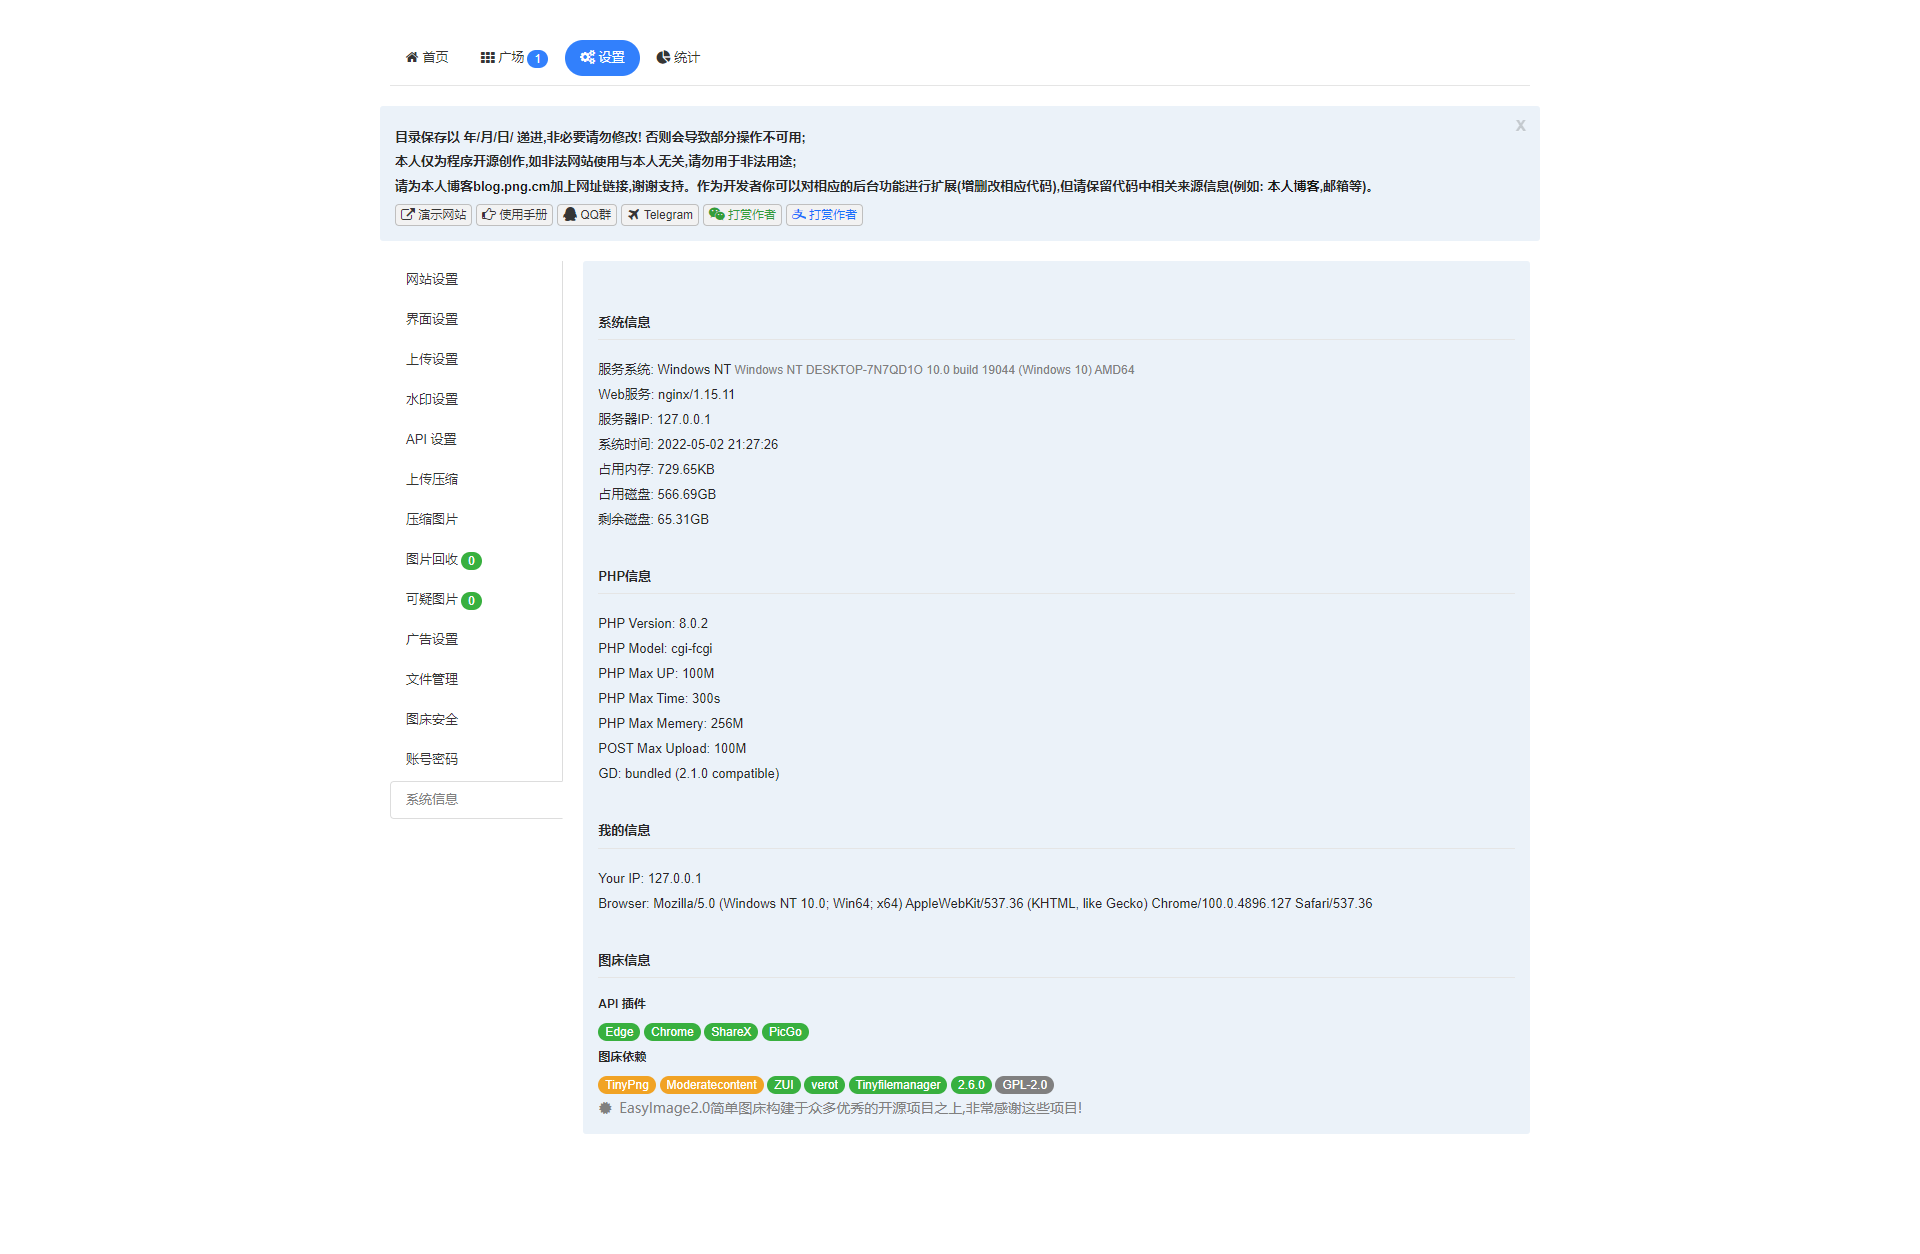
图床特点
- 支持API
- 支持仅登录后上传
- 支持设置图片质量
- 支持压缩图片大小
- 支持文字/图片水印
- 支持设置图片指定宽/高
- 支持上传图片转换为指定格式
- 支持限制最低宽度/高度上传
- 支持上传其他文件格式
- 在线管理图片
- 支持网站统计
- 支持设置广告
- 支持图片鉴黄
- 支持自定义代码
- 支持上传IP黑白名单
- 支持上传日志IP定位
- 支持限制日上传次数
- 支持创建仅上传用户
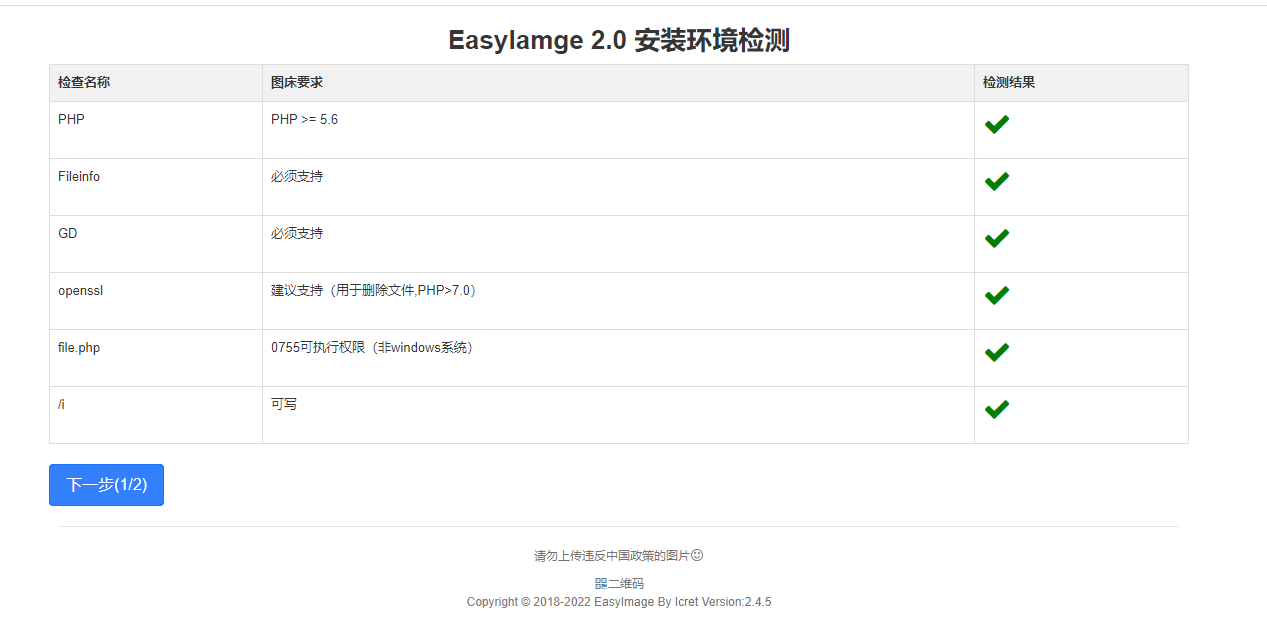
- 对于安装环境要求极低
- 对于服务器性能要求极低
- 理论上支持所有常见格式
安装教程
本文仅展示手动安装教程, 非Docker非宝塔(BT); 因特定情况下不想使用docker和各种面板, 故出此教程
1. 安装php7.4及各种模块, nginx, git
1
2
3
4
| # Debian/Ubuntu
apt install -y php7.4 php7.4-fpm php7.4-common php7.4-mbstring php7.4-zip php7.4-gd nginx git
# CentOS/AlmaLinux
yum install -y php7.4 php7.4-fpm php7.4-common php7.4-mbstring php7.4-zip php7.4-gd nginx git
|
2. 克隆EasyImages2.0到目录, 并设置上传目录权限
1
| git clone https://github.com/icret/EasyImages2.0.git <目录> chmod -R 777 <目录/i/>
|
3. 配置php
1. 修改php上传限制
1
| vim /etc/php/7.4/fpm/php.ini
|
修改其中的 post_max_size和 upload_max_filesize, 改为 16M最佳。
2. 修改完毕重启php
1
2
3
| systemctl restart php7.4-fpm
# or
service php7.4-fpm restart
|
4. 配置nginx
创建配置并填入以下内容
1
2
3
4
5
6
7
8
9
10
11
12
13
14
15
16
17
18
19
20
21
22
23
24
25
26
27
28
29
30
31
32
33
34
35
36
37
38
39
| server {
server_name <图床域名>;
listen 80;
rewrite ^(.*)$ https://$host$1 permanent;
}
server {
server_name <图床域名>;
listen 443 ssl http2;
ssl_certificate <证书路径>;
ssl_certificate_key <密钥路径>;
ssl_protocols TLSv1.1 TLSv1.2 TLSv1.3;
root <easyimages2.0目录>;
index index.php index.html index.htm;
location / {
try_files $uri $uri/ /index.php$is_args$args;
}
location ~ \.php$ {
include fastcgi.conf;
include fastcgi_params;
fastcgi_pass unix:/run/php/php7.4-fpm.sock;
fastcgi_index index.php;
fastcgi_split_path_info ^(.+\.php)(/.+)$;
fastcgi_param PATH_INFO $fastcgi_path_info;
fastcgi_param PATH_TRANSLATED $document_root$fastcgi_path_info;
fastcgi_param SCRIPT_FILENAME $document_root$fastcgi_script_name;
fastcgi_param PHP_VALUE "open_basedir=$document_root:/tmp/:/proc/";
}
location ~* ^/(i|public)/.*\.(php|php5)$ {
deny all;
}
location = /robots.txt {
allow all;
log_not_found off;
access_log off;
}
}
|
测试并重启nginx
1
2
3
| nginx -t
# 若无报错继续
nginx -s reload
|
至此, easyimages已安装完成
5. 启动图床
根据提示配置图床
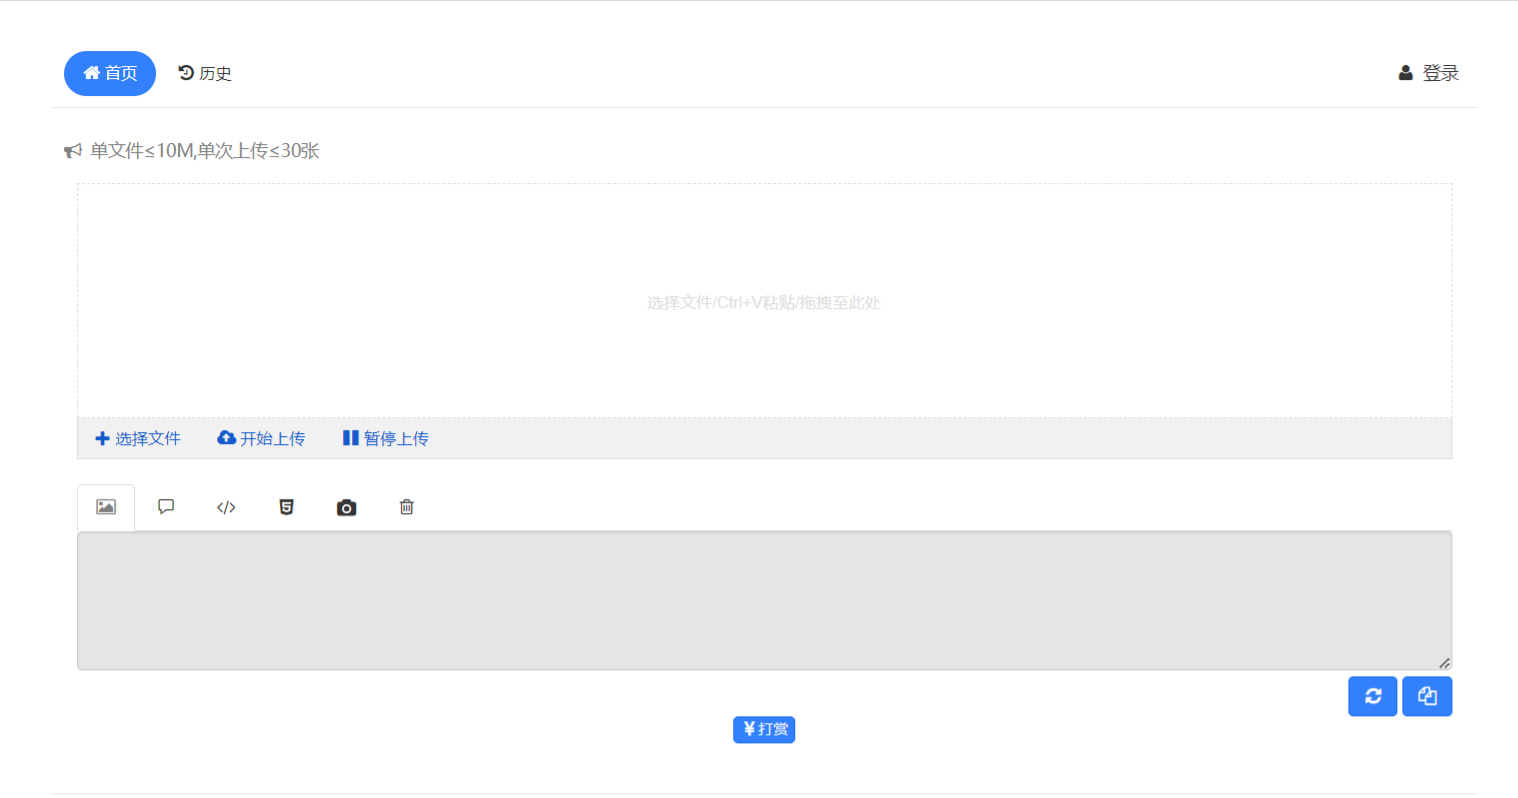
图床演示